**This article was revised on 2019.08.30 due to the updates of ACR11.4**
RICOH THETA Z1
RICOH's flagship 360CAM has released on late May,2019. I believe this is one of the biggest news topic in GSV world.
The most important improvement is; "Both RAW(DNG) and JPEG formats can be saved with RICOH THETA Z1". We can enjoy more camera-like colors and image quality editing.

THETA Basic app for iOS / Shooting Settings
I gonna tell the basic workflow of mine,"RAW(DNG) develop in Lightroom Classic and RICOH THETA Stitcher". First of all, you need to purchase Adobe CC Photo Plan. I know we have a ton of methods to do such works. However, LR + Plugin is much easier way I've ever done, even if I am a PTGui Pro user.

Just letting you know, I'm novice user of LR.
Shooting 360 with RAW(DNG) is fun, but not easy.
Caption; ISO priorty(f/2.1 ISO-100 1/25ss) Adobe Modern04
To get RAW(DNG) images, you must shoot with Auto(DR compensation),Av,Tv,ISO or Manual modes. I recommend you to select ISO priorty(ISO 80-100). Anytime you can adjust EV value. If you are skilled photographer, don't hesitate to use Manual mode. You can enjoy "Slow Shutter in 360" with selecting the mechanical aperture(2.1,3.5 or 5.6)
Caption; Manual(f/5.6 ISO-100 4.0ss) Adobe Artistic06
I always ignore White Balance or set Auto WB. No worries. That's an advantage of RAW(DNG) shooting.
Let's get started!
Step 1

Besides Adobe Lightroom Classic, install RICOH THETA Stitcher(Win/Mac) and check the settings shown as below.
Export /Lightroom Classic(Win10 Pro 1809)
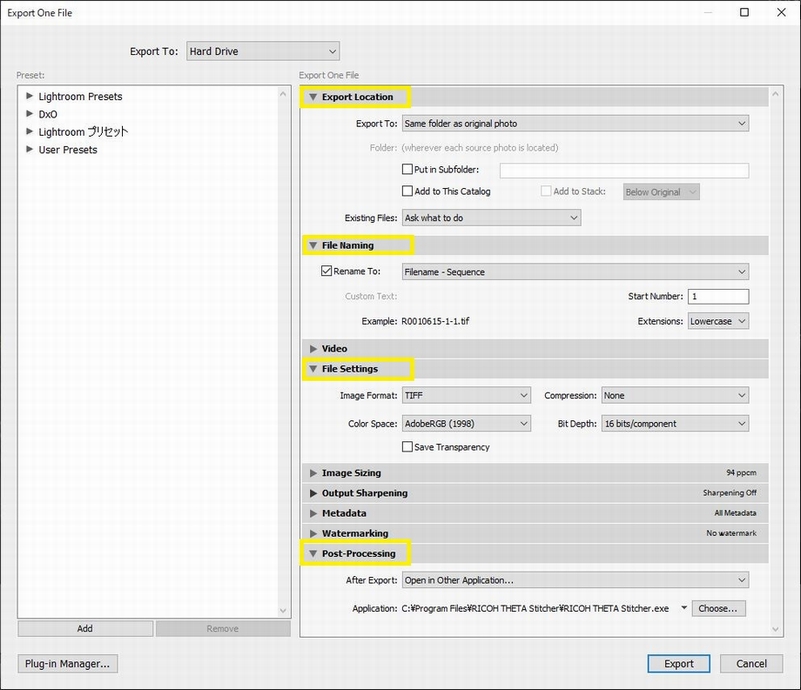
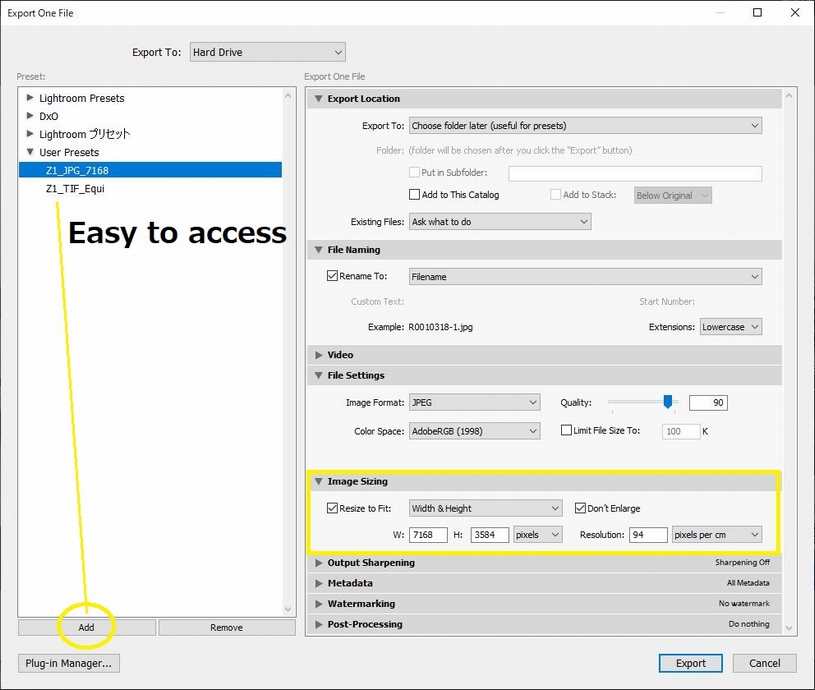
Select any image and click "File" => "Export" to open the window in Lightroom Classic. and refer the settings as below.
Select "Same folder as original photo" for "Export to".
Select "Filename - Sequence" for "Rename to". The plugin requires the original file name.
Select "TIFF"(Format), "None"(Compression), "AdobeRGB(1998)"(Color Space) and "16 bit"(Bit Depth) for each setting.
Select "Open in other Application..." for "After Export". and choose "RICOH THETA Stitcher.exe" in the specific folder/location.
*Adding presets on the export window would be more useful and accessible. See the final pic.
Step 2
Many photographers might use Mac on such kind of works. but I'm a Dowser. See the specification of my machine.
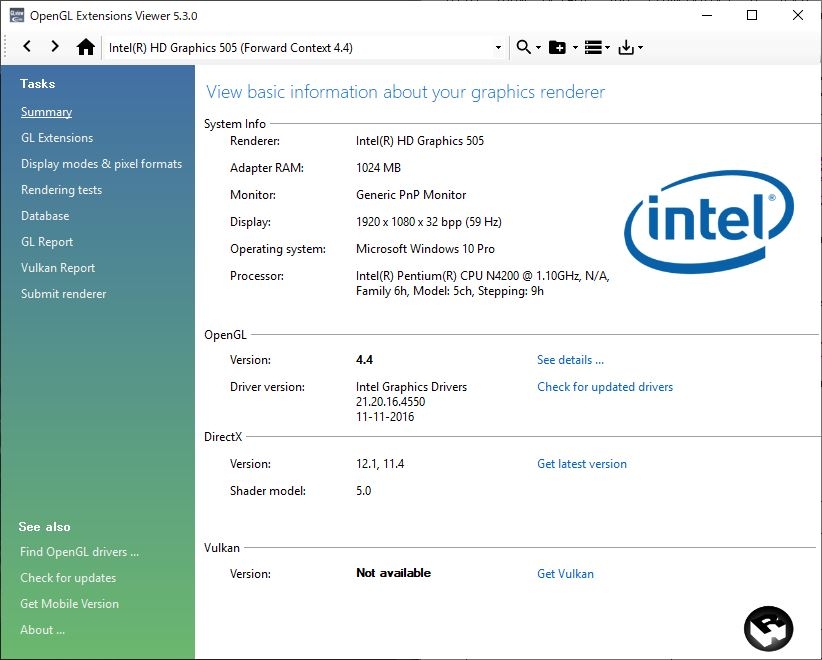
OpenGL Extension Viewer
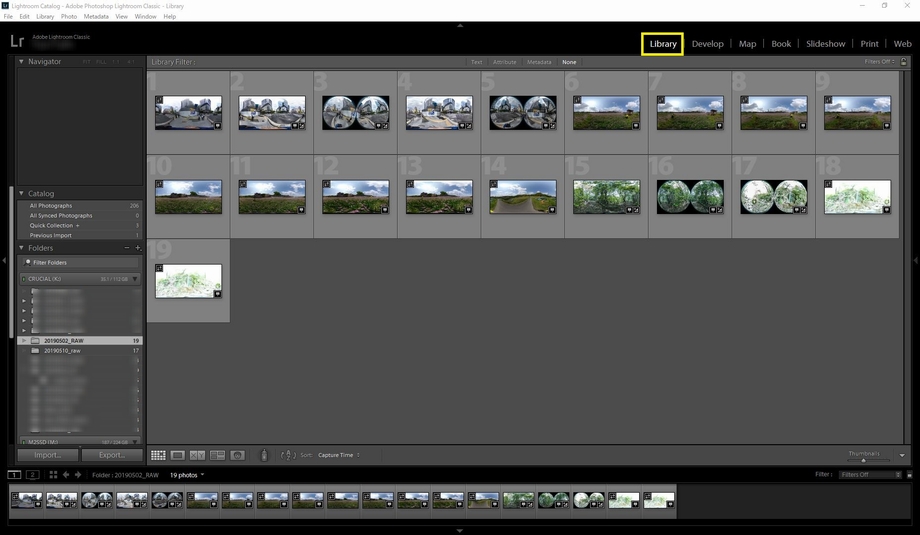
Library-Catalog /Lightroom Classic
Drop Z1 RAW(DNG) images on the Library and import them.
Develop /Lightroom Classic
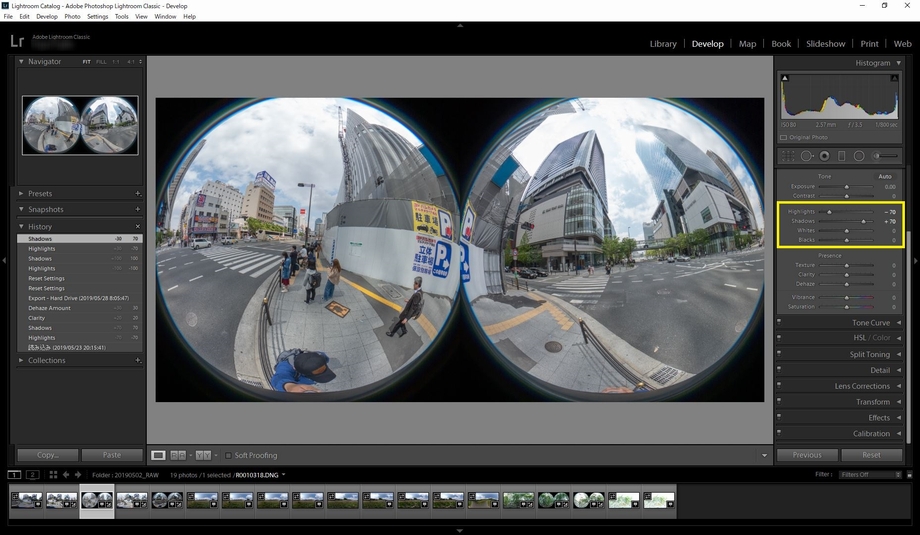
Select one RAW(DNG) and go to Develop tab. And then, I always arrange Highlights/Shadows on Tone/Basic. "As Shot" is automatically selected for WB. You can change it as you wish.
Develop /Lightroom Classic
Decrease highlights(slide to left) to get blue sky and invisible objects. Increase Shadows(slide to right) to get back the brightness. It's done. I highly recommend you to touch the other controls after export. Because RAW(DNG) is Dual Fisheye image, your edits on it may unexpectedly affect the image quality due to the black space around.
Adobe ACR 360–Aware Feature Overview
"Lens correction" has been unsupported or partially-supported controls yet. Do it before stitching, otherwise the Seam Line issue may remain unresolved.
Step 3
Export Tiff 16bit format and stitch to Equirectangular.
RICOH THETA Stitcher(Win10 Pro)
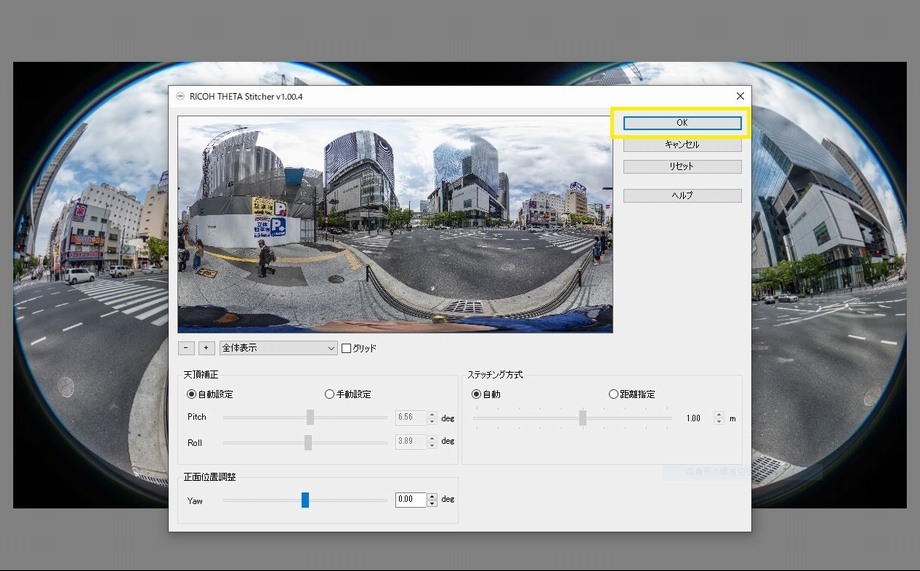
At first, Lightroom exports "Dual Fisheye Image". If your settings is OK, RICOH THETA Stitcher automatically starts and the stitcher window will appear. You can edit YAW,Pitch and Roll like as PTGui. Click "OK" to continue the stitching process and Dual Fisheye(DNG) image will be converted to equirectangular(Tiff16bit) in a blink of eye.
Step 4
This step is OPTIONAL. You can also export equirectangular image in JPG format during Step 3.
All the motivated photographers should repeat Step 3 process for each of the RAW(DNG) and import them again to the Library.
Sharpning Mask /Lightroom Classic
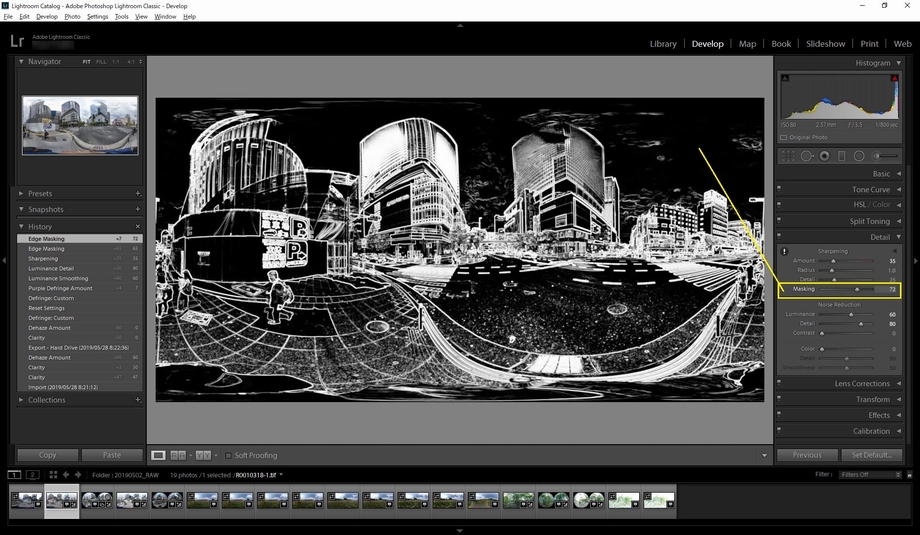
Sharpening and Noise Reduction(Luminance/Color) as you wish. Masking tool can remove unpreferable sharpness from the black area.
**Hold Alt(Option) key and slide the Masking bar.
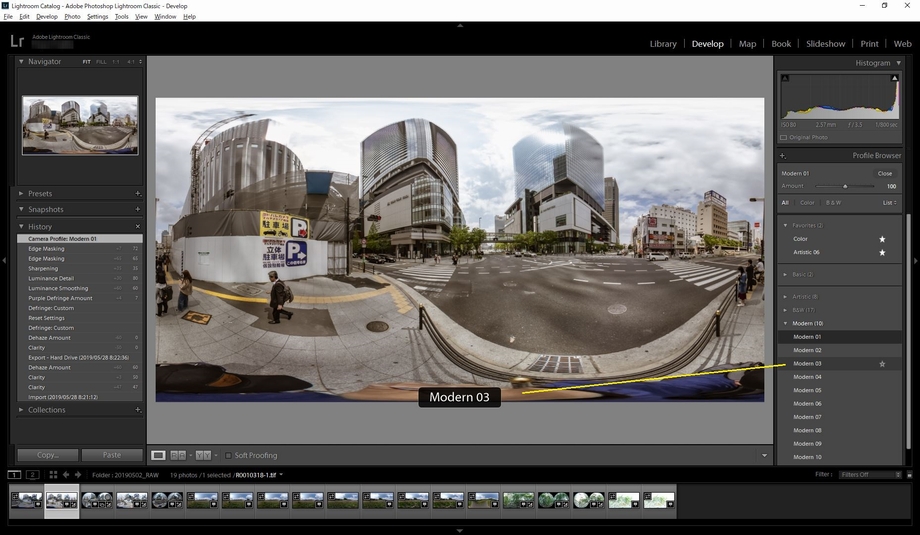
Profile Browser /Lightroom Classic
Open "Profile Browser" in Basic Panel. You can choose your favorite profile of color. It might make you a famous 360 photo artist?
Presets /RICOH THETA Stitcher
Finally, click "Export" again to get the image in JPG format. The resolution of 7168x3584 is the best size due to the x512 method. This is one of the well-known issues in GSV world.
***You can select the multiple tiff images in this process.
Conclusion
Basic Workflow ISO priorty (f/3.5 ISO-80 1/800ss) Modern03 No nadir touched #thetaz1 #theta360 - Spherical Image - RICOH THETA
Caption; ISO priorty (f/3.5 ISO-80 1/800ss) Modern03, No nadir touched.
I repeat my words. "This is Basic Workflow." You can see tons of the instruction videos on YouTube. I'm just a GSV trusted photographer with at least 50 approved 360 photos, NOT an artist. Time is money.

If you want to improve your skill(Manual Shooting, RAW develop, more edits of color...etc.). Just follow Sam Rohn's post. He is real PROFESSIONAL.
Good luck!
Special thanks to the following people. I've deeply appreciated for their cooperation, advices and suggestions.
- Gildas Sidobre, Eng.D.
- Michael Usami
- Mihai Radu
- Naoto Somese
- Sam Rohn
- Yasuhiko Naito
- Zeljko Soletic
***In alphabetical order.
投稿日 Issue date; 2019.05.28